It’s July. Or August. Or one of those relentless late June days that skipped spring entirely and went straight to the surface of the sun. The temperature outside is somewhere in the “I can’t even” range. You’ve already cranked the air conditioning to its limit. The last thing the absolute last thing you want to do is turn on your oven and add another several hundred degrees of ambient heat to your already suffering kitchen.
And yet. You want dessert. Because of course you do. Because it’s summer and summer is practically synonymous with sweet, cold, delicious things. Because there are guests coming over for a backyard cookout. Because the kids are restless and a little treat goes a long way. Because you’ve been good all week and you’ve earned it.
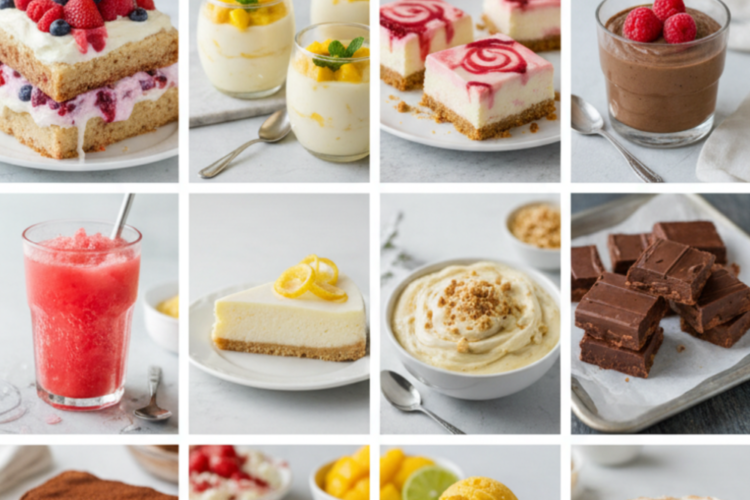
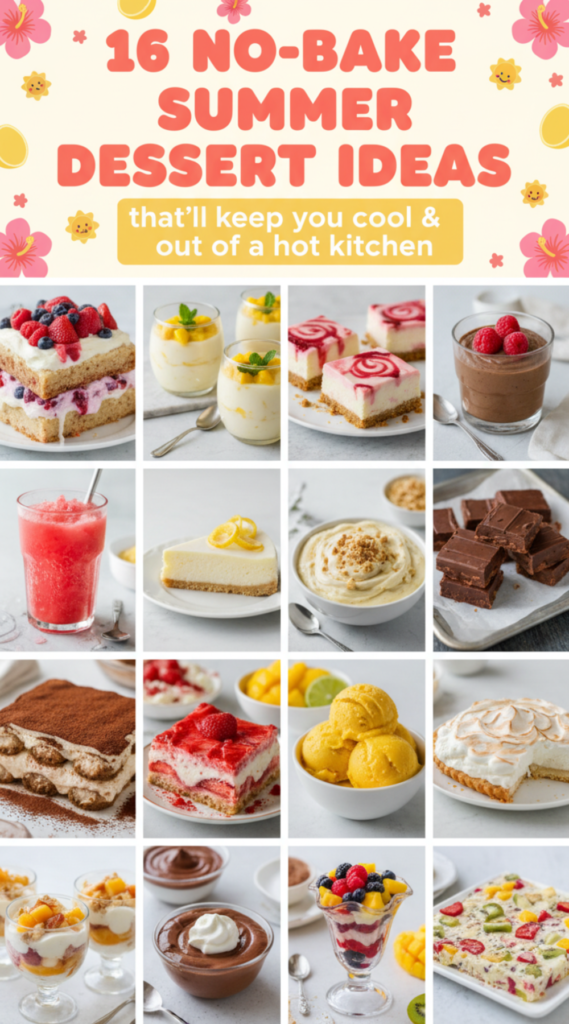
These 16 no-bake summer dessert ideas cover everything from simple five-minute freezer treats to elegant dinner party showstoppers. Some require only a few ingredients. Some can be made days in advance. All of them will keep you out of a hot kitchen and put something genuinely delicious on the table.
Your oven gets the summer off. Let’s get into it.
1. Icebox Cake (The Classic)
The icebox cake is the original no-bake dessert a Depression-era creation that proved you didn’t need heat to make something magical. The concept is beautifully simple: layer crisp cookies with whipped cream and refrigerate overnight. The cookies absorb moisture from the cream, softening into something that tastes and cuts remarkably like a real cake. It’s one of those dishes where the result is somehow greater than the sum of its extremely humble parts.
What You’ll Need (serves 10-12):
- 3 cups heavy whipping cream, cold
- 3 tablespoons powdered sugar
- 2 teaspoons vanilla extract
- 2 packages (9 oz each) chocolate wafer cookies or thin chocolate cookies
- Optional flavor variations: add 2 tablespoons instant espresso powder to the cream, or fold in 1/2 cup lemon curd, or add fresh berries between layers
For Topping:
- Extra whipped cream
- Shaved dark chocolate or chocolate curls
- Fresh berries
- Crushed cookies
How to Make It:
Using a stand mixer or hand mixer, whip the cold heavy cream with powdered sugar and vanilla on medium-high speed until stiff peaks form about 4-5 minutes. The cream should hold its shape when you lift the beaters. Don’t overmix or it becomes grainy and starts turning into butter.
On a large rectangular platter or in a 9×13 inch dish, spread a thin layer of whipped cream to act as a base that prevents the cookies from sliding. Lay a single layer of chocolate wafers over the cream, fitting them together as tightly as possible. Spread a generous layer of whipped cream about 1/2 inch thick over the cookies. Repeat: cookies, cream, cookies, cream, until you run out of cookies. You should have about 4-5 layers. Finish with a thick layer of whipped cream on top.
Cover loosely with plastic wrap and refrigerate for at least 8 hours overnight is ideal and 24 hours is even better. The longer it sits, the more the cookies soften and the more the whole thing resembles actual cake.
Just before serving, decorate the top with extra whipped cream, chocolate shavings, and fresh berries. Slice and serve cold.
Flavor variations: This basic template is endlessly adaptable. Try vanilla wafers with lemon cream and sliced strawberries. Graham crackers with peanut butter cream and banana slices. Gingersnaps with maple cream and peaches. The cookie-cream-refrigerate formula works with almost any combination you can dream up.
2. Mango Coconut Panna Cotta
Panna cotta is the Italian dessert that looks like it requires culinary school training and actually requires about 15 minutes and four ingredients. It’s silky, barely set cream that wobbles elegantly when you move it and melts on the tongue with an almost impossibly smooth texture. This tropical version with a coconut cream base and a bright mango coulis on top is the kind of dessert that makes people think you’re a far more accomplished cook than you actually are.
What You’ll Need (serves 6):
For the Coconut Panna Cotta:
- 2 1/2 teaspoons (1 packet) unflavored powdered gelatin
- 3 tablespoons cold water
- 1 can (14 oz) full-fat coconut milk
- 1 cup heavy cream
- 1/3 cup sugar
- 1 teaspoon vanilla extract
- Pinch of salt
For the Mango Coulis:
- 2 ripe mangoes, peeled and roughly chopped (or 2 cups frozen mango, thawed)
- 2 tablespoons sugar
- Juice of 1 lime
- Pinch of chili powder or cayenne (optional the heat against the sweet mango is extraordinary)
For Garnish:
- Diced fresh mango
- Toasted shredded coconut
- Fresh mint leaves
- Lime zest
How to Make It:
Sprinkle the gelatin over the cold water in a small bowl. Let it sit for 5 minutes to bloom it will absorb the water and become spongy. This step is what activates the gelatin’s thickening power.
In a small saucepan over medium heat, combine the coconut milk, heavy cream, sugar, and salt. Heat, stirring occasionally, until the sugar completely dissolves and the mixture is steaming but not boiling about 4-5 minutes. Remove from heat. Add the bloomed gelatin and whisk until it’s completely dissolved. Stir in the vanilla.
Divide the mixture among 6 ramekins, small glasses, or silicone molds. Let cool to room temperature, then cover and refrigerate for at least 4 hours until set. The panna cotta should be firm enough to hold its shape but still jiggly like very thick yogurt.
Make the mango coulis by blending the mango, sugar, and lime juice until completely smooth. Strain through a fine mesh sieve for a perfectly smooth sauce. Taste add chili powder if using and adjust the sugar and lime.
To serve, you can either serve the panna cotta directly in the glasses (no unmolding required, which is the low-stress approach) or unmold them by running a thin knife around the edge and inverting onto plates. Spoon the mango coulis over or alongside and garnish with fresh mango, toasted coconut, mint, and lime zest.
3. Frozen Strawberry Cheesecake Bars
All the flavors of a classic strawberry cheesecake creamy filling, buttery graham cracker crust, fresh strawberry topping in frozen bar form. These are wildly popular at summer gatherings, can be made several days ahead, and disappear from the serving platter at an alarming speed. Consider yourself warned.
What You’ll Need (makes 16 bars):
For the Crust:
- 2 cups graham cracker crumbs (about 14 full sheets)
- 6 tablespoons unsalted butter, melted
- 2 tablespoons sugar
- Pinch of salt
For the Cheesecake Filling:
- 16 oz cream cheese, completely softened to room temperature
- 1 can (14 oz) sweetened condensed milk
- 1/3 cup fresh lemon juice
- 2 teaspoons vanilla extract
- 1 cup heavy whipping cream, whipped to stiff peaks
For the Strawberry Topping:
- 2 cups fresh strawberries, hulled and sliced
- 2 tablespoons sugar
- 1 tablespoon lemon juice
- 1 teaspoon cornstarch dissolved in 1 tablespoon water (optional, helps it gel slightly)
How to Make It:
Line a 9×13 inch baking pan with parchment paper, leaving overhang on the long sides for easy removal. Combine the graham cracker crumbs, melted butter, sugar, and salt. Press firmly and evenly into the bottom of the prepared pan use the bottom of a measuring cup to really compact it. Freeze for 15 minutes.
Beat the softened cream cheese until completely smooth any lumps at this stage will remain in the final product, so take your time. Mix in the sweetened condensed milk, lemon juice, and vanilla, beating until silky. Gently fold in the whipped cream in three additions, being careful not to deflate the air you’ve worked in this is what gives the filling its light, moussey texture.
Spread the cheesecake filling evenly over the frozen crust. Smooth the top.
Make the strawberry topping by combining the strawberries, sugar, and lemon juice in a small saucepan over medium heat. Cook for 5-8 minutes until the strawberries break down and release their juices. Add the cornstarch mixture if using and stir until slightly thickened. Let cool completely.
Spoon the strawberry topping over the cheesecake layer. Cover and freeze for at least 6 hours or overnight.
When ready to serve, let the bars sit at room temperature for 5 minutes before lifting out using the parchment overhang and cutting into bars with a sharp knife.
4. Chocolate Avocado Mousse
Before you close this tab just trust me for a moment. Avocado chocolate mousse sounds like a wellness blogger’s idea of a joke, but it is genuinely, unironically, surprisingly one of the best chocolate desserts you can make without cooking. The avocado provides a fat and creaminess that mimics dairy beautifully, while the chocolate completely overwhelms the avocado flavor. What you’re left with is something silky, intensely chocolatey, and deeply satisfying that also happens to be dairy-free and made entirely from whole foods.
What You’ll Need (serves 4):
- 3 very ripe avocados (they should be soft enough to mash easily brown spots on the skin are fine)
- 1/2 cup good quality cocoa powder, sifted
- 1/3 cup maple syrup or honey (adjust to taste)
- 1/4 cup full-fat coconut milk
- 1 teaspoon vanilla extract
- 1/4 teaspoon espresso powder (amplifies the chocolate flavor without adding coffee flavor)
- Pinch of sea salt
- 1/4 teaspoon cinnamon (optional)
For Topping:
- Fresh raspberries or strawberries
- Shaved dark chocolate
- Sea salt flakes
- Toasted hazelnuts or sliced almonds
- Coconut whipped cream
- Fresh mint
How to Make It:
Halve the avocados and remove the pits. Scoop the flesh into a food processor or high-powered blender. Add the cocoa powder, maple syrup, coconut milk, vanilla, espresso powder, salt, and cinnamon if using. Blend on high until completely smooth stop and scrape down the sides two or three times to make sure there are no avocado chunks lurking.
Taste the mousse and adjust. More maple syrup for sweetness. More cocoa for chocolate intensity. More salt to bring all the flavors forward. More coconut milk if the consistency is too thick.
Spoon into individual glasses, ramekins, or a large serving bowl. Refrigerate for at least 1 hour the mousse firms up as it chills and the flavors develop beautifully.
Top with fresh berries, chocolate shavings, a tiny pinch of sea salt, and whatever else looks good to you.
Serve to your guests without revealing the avocado secret. Watch them inhale it. Then tell them what’s in it. Watch their faces. Entirely worth it.
5. Watermelon Granita
Granita is the Italian frozen dessert that sits somewhere between a snow cone and a sorbet coarser than sorbet, lighter than ice cream, and infinitely refreshing on a hot day. It requires no special equipment, no ice cream maker, and barely any effort. Just frozen fruit juice, scraped periodically with a fork to create those gorgeous icy crystals that melt on your tongue in the most satisfying way.
What You’ll Need (serves 6-8):
- 6 cups seedless watermelon, cut into chunks (about half a small watermelon)
- 3 tablespoons fresh lime juice
- 2 tablespoons honey or simple syrup (adjust to taste depending on how sweet your watermelon is)
- Pinch of salt
- Fresh mint leaves for garnish
- Optional: 2 tablespoons tequila or vodka for an adults-only version (alcohol prevents it from freezing completely solid, keeping the texture perfectly slushy)
How to Make It:
Blend the watermelon chunks until completely smooth. Pour through a fine mesh strainer to remove any remaining pulp or seeds you want a perfectly smooth juice. Stir in the lime juice, honey, and salt. Taste and adjust sweetness. The mixture should taste slightly sweeter than you want the finished granita to taste, as freezing dulls sweetness slightly.
Pour the mixture into a shallow metal baking pan metal conducts cold better than glass and freezes the granita faster. Slide it into the freezer.
Every 30 minutes for the next 3-4 hours, remove the pan from the freezer and use a fork to vigorously scrape and stir the mixture, breaking up the ice crystals that form around the edges. The goal is a loose, crystalline, fluffy texture rather than a solid block of ice. If you forget and it freezes solid, don’t panic let it sit at room temperature for 15 minutes, then scrape aggressively.
Serve in chilled glasses or bowls, garnished with fresh mint. Eat immediately.
The granita can be made up to 3 days ahead. Store in the freezer and re-scrape with a fork just before serving to break up any clumps.
6. No-Bake Lemon Cheesecake
Light, creamy, tangy, and elegant this no-bake lemon cheesecake is the dessert to make when you want to genuinely impress people without actually working very hard. It sets in the fridge overnight, cuts beautifully, and delivers that perfect balance of rich cream cheese and bright citrus that makes lemon desserts so universally beloved.
What You’ll Need (serves 10-12):
For the Crust:
- 2 cups graham cracker crumbs
- 1/2 cup unsalted butter, melted
- 3 tablespoons sugar
- Pinch of salt
For the Filling:
- 24 oz full-fat cream cheese, completely softened
- 1 cup powdered sugar, sifted
- 1/3 cup fresh lemon juice (about 3 large lemons)
- Zest of 3 lemons
- 2 teaspoons vanilla extract
- 1 1/2 cups heavy whipping cream, cold
For the Lemon Curd Topping:
- 3 large eggs plus 3 egg yolks
- 3/4 cup sugar
- 1/2 cup fresh lemon juice
- Zest of 2 lemons
- 6 tablespoons cold unsalted butter, cut into pieces
- Pinch of salt
How to Make It:
Make the lemon curd first so it has time to cool. Whisk eggs, yolks, sugar, lemon juice, and zest in a medium saucepan. Cook over medium-low heat, stirring constantly with a wooden spoon or heatproof spatula, for 8-10 minutes until thick enough to coat the back of a spoon. Remove from heat and strain through a fine mesh sieve. Whisk in the cold butter, one piece at a time. Press plastic wrap directly onto the surface and refrigerate until cool and set.
Make the crust by combining graham cracker crumbs, melted butter, sugar, and salt. Press firmly and evenly into the bottom and slightly up the sides of a 9-inch springform pan. Freeze for 20 minutes.
Beat the cream cheese until completely smooth. Add powdered sugar, lemon juice, lemon zest, and vanilla. Beat until silky. In a separate bowl, whip the heavy cream to stiff peaks. Gently fold the whipped cream into the cream cheese mixture in three additions until fully incorporated and no white streaks remain.
Pour the filling over the frozen crust and smooth the top. Refrigerate for at least 6 hours overnight is ideal. The cheesecake needs time to fully set.
Spread the cooled lemon curd over the top of the set cheesecake. Return to the fridge for another hour. When ready to serve, run a warm knife around the inside edge of the springform pan before releasing.
Garnish with thin lemon slices, lemon zest curls, and fresh berries.
7. Banana Nice Cream
Nice cream is what happens when you freeze bananas and blend them into a smooth, creamy, ice cream-like dessert using nothing but the banana itself. No dairy. No added sugar. No special equipment beyond a blender or food processor. And the result tastes genuinely, surprisingly like ice cream. It’s one of the most useful dessert tricks you’ll ever learn.
What You’ll Need (serves 2-3):
Base:
- 4 very ripe bananas, peeled, sliced, and frozen overnight
Flavor Variations choose one:
Peanut Butter Chocolate:
- 3 tablespoons peanut butter
- 2 tablespoons cocoa powder
- 1 tablespoon maple syrup
- Pinch of sea salt
Strawberry:
- 1 cup frozen strawberries
- 1 tablespoon honey
- 1 teaspoon vanilla extract
Mango Coconut:
- 1 cup frozen mango
- 1/4 cup coconut milk
- 1/2 teaspoon lime zest
Mint Chocolate Chip:
- 1/4 teaspoon peppermint extract
- 2 tablespoons mini chocolate chips
- A few drops of natural green food coloring (optional)
How to Make It:
Place the frozen banana slices in a food processor or high-powered blender. Process on high, stopping to scrape down the sides as needed. The bananas will go through several stages first crumbly, then chunky, then suddenly smooth and creamy. Keep going until you have a perfectly smooth, soft-serve-like consistency. This takes 2-4 minutes.
Add your chosen flavor additions and blend until combined. Fold in any mix-ins like chocolate chips by hand.
At this point, you have two options. Eat it immediately as soft-serve consistency which is genuinely wonderful. Or transfer to a freezer-safe container and freeze for 2 hours for a firmer, scoopable texture.
Serve in cones, bowls, or cups with whatever toppings make you happy chocolate sauce, sprinkles, fresh fruit, crushed nuts. The possibilities are limitless.
8. No-Bake Chocolate Peanut Butter Bars
These bars are the no-bake equivalent of a Reese’s Peanut Butter Cup but better. Thicker, richer, more satisfying, and completely homemade. They take about 15 minutes to assemble and then the fridge does everything else. They’re deeply indulgent, endlessly crowd-pleasing, and dangerously addictive. You’ve been warned.
What You’ll Need (makes 16-20 bars):
For the Peanut Butter Base:
- 2 cups creamy peanut butter
- 1/2 cup unsalted butter, melted
- 2 cups powdered sugar, sifted
- 1 1/2 cups graham cracker crumbs
- 1 teaspoon vanilla extract
- 1/2 teaspoon salt
For the Chocolate Topping:
- 2 cups good quality semi-sweet or dark chocolate chips
- 2 tablespoons coconut oil or unsalted butter
- Flaky sea salt for finishing
How to Make It:
Line a 9×13 inch baking pan with parchment paper. In a large bowl, combine the peanut butter, melted butter, powdered sugar, graham cracker crumbs, vanilla, and salt. Mix thoroughly until you have a thick, uniform mixture that holds together when pressed. It should be slightly sticky.
Press this mixture firmly and evenly into the prepared pan really pack it down and use the bottom of a flat glass or measuring cup to smooth the surface completely. The more compact and flat the base, the cleaner your final bars will be. Refrigerate for 30 minutes.
Melt the chocolate chips with the coconut oil or butter in a heatproof bowl set over simmering water, stirring until completely smooth. Alternatively, microwave in 30-second bursts, stirring between each, until melted. Pour the melted chocolate over the peanut butter base and use a spatula to spread it in an even layer that covers the entire surface.
Sprinkle flaky sea salt over the chocolate while it’s still liquid.
Refrigerate for at least 2 hours until the chocolate is completely set and firm. Lift out using the parchment overhang and cut into bars with a sharp knife. If the chocolate cracks as you cut which it will tend to do let the bars sit at room temperature for 5 minutes to soften slightly before slicing.
Store in the fridge or freezer.
9. Tiramisu
Tiramisu contains no baked elements whatsoever it’s made entirely from ladyfinger cookies soaked in coffee and layered with a mascarpone cream. Despite its simple no-bake construction, it consistently ranks as one of the most sophisticated, impressive desserts you can serve. It also gets dramatically better the longer it sits, making it the perfect make-ahead summer dinner party dessert.
What You’ll Need (serves 10-12):
- 6 large egg yolks
- 3/4 cup sugar
- 2 cups mascarpone cheese, room temperature
- 2 cups heavy whipping cream
- 2 teaspoons vanilla extract
- 2 cups strong brewed espresso or very strong coffee, cooled
- 3 tablespoons coffee liqueur (Kahlúa or Tia Maria optional but delicious)
- 40-44 ladyfinger cookies (savoiardi)
- 3 tablespoons good quality cocoa powder for dusting
- Dark chocolate shavings for garnish
How to Make It:
Beat the egg yolks and sugar together with a hand mixer on high speed for 4-5 minutes until the mixture is very pale, thick, and tripled in volume. It should fall from the beaters in thick ribbons. Add the mascarpone and vanilla and beat on low until just combined and smooth.
In a separate bowl, whip the heavy cream to stiff peaks. Fold the whipped cream into the mascarpone mixture in three gentle additions use a large rubber spatula and fold from the bottom up, preserving as much air as possible. The mixture should be very light and mousse-like.
Combine the cooled coffee with the coffee liqueur in a shallow bowl. Working quickly, dip each ladyfinger briefly into the coffee mixture literally one second per side. They should be moistened but not saturated. Soggy ladyfingers create a mushy tiramisu.
Arrange a single layer of dipped ladyfingers in the bottom of a 9×13 inch dish. Spread half the mascarpone cream over them in a smooth layer. Arrange another layer of coffee-dipped ladyfingers on top. Spread the remaining cream over everything, smoothing the top beautifully.
Cover and refrigerate for at least 8 hours. Overnight is better. 24 hours is best.
Just before serving, dust the entire top generously with cocoa powder through a fine mesh sieve for a perfectly even, professional-looking finish. Add chocolate shavings.
Cut into squares and serve cold.
10. Strawberry Pretzel Icebox Dessert
Sweet and salty. Creamy and crunchy. Fresh and rich. This iconic summer dessert a classic American potluck staple that’s been showing up at backyard gatherings for decades perfectly balances all four of those contrasts in every single bite. It’s unpretentious, deeply satisfying, and universally beloved.
What You’ll Need (serves 12-15):
For the Pretzel Crust:
- 2 cups crushed pretzels (not too fine you want some texture)
- 3/4 cup unsalted butter, melted
- 3 tablespoons sugar
For the Cream Cheese Layer:
- 8 oz cream cheese, completely softened
- 1 cup powdered sugar
- 2 teaspoons vanilla extract
- 2 cups heavy whipping cream, whipped to stiff peaks
For the Strawberry Layer:
- 2 packages (6 oz each) strawberry Jell-O
- 2 cups boiling water
- 2 cups cold water
- 4 cups fresh strawberries, hulled and sliced
How to Make It:
Combine the crushed pretzels, melted butter, and sugar. Press evenly into the bottom of a 9×13 inch baking dish. Freeze for 20 minutes.
Make the cream cheese layer: Beat the cream cheese with powdered sugar and vanilla until completely smooth. Fold in the whipped cream until fully combined. Spread this layer over the frozen pretzel crust, making absolutely sure to seal the cream layer all the way to the edges of the dish. This seal is critical it prevents the Jell-O layer from seeping down and making the pretzel crust soggy.
Refrigerate for 30 minutes.
Dissolve the Jell-O in the boiling water, stirring for 2 minutes. Add the cold water and stir. Let cool at room temperature until the Jell-O is the consistency of raw egg whites thick enough to partially suspend the strawberries but still pourable. Stir in the sliced strawberries. Pour gently over the cream cheese layer.
Refrigerate for at least 6 hours or overnight until the Jell-O is completely set.
Cut into squares and serve cold. The three distinct layers salty crunchy pretzels, creamy vanilla layer, and jiggly strawberry Jell-O are revealed with every slice.
11. Mango Lime Sorbet
Two ingredients. No ice cream maker needed. Intensely fruity, perfectly refreshing, and the most beautiful sunset orange color you’ve ever seen in a dessert. This is summer in a bowl.
What You’ll Need (serves 4-6):
- 4 cups frozen mango chunks (frozen mango is already sweet and perfectly ripe it works better here than fresh mango)
- Juice and zest of 2 limes
- 2-3 tablespoons honey or agave syrup (adjust based on sweetness of your mango)
- Pinch of salt
- Pinch of chili powder or Tajín (optional takes this to another level)
For Serving:
- Lime wedges
- Fresh mint
- Extra Tajín or chili salt on the rim
How to Make It:
Let the frozen mango sit at room temperature for 10 minutes to soften slightly this makes it easier to blend and prevents your food processor motor from crying.
Place the mango in a food processor with the lime juice, lime zest, honey, salt, and chili powder if using. Process on high, stopping to scrape down the sides, until completely smooth and creamy. Taste and adjust more lime for tartness, more honey for sweetness, more chili for heat.
Serve immediately as a soft sorbet consistency, scooped into bowls or glasses. Or transfer to a freezer-safe container and freeze for 2 hours for a firmer texture.
Garnish with lime wedges, fresh mint, and a sprinkle of Tajín if using. The chili-lime combination with the sweet mango is one of the great flavor partnerships in summer dessert history.
12. No-Bake Coconut Cream Pie
Silky, tropical, and loaded with coconut flavor this coconut cream pie sets in the fridge rather than the oven and delivers all the satisfaction of the classic diner version without turning your kitchen into a sauna. The coconut cream filling is light and mousse-like, the graham cracker crust is buttery and crunchy, and the toasted coconut on top adds a gorgeous flavor and textural contrast.
What You’ll Need (serves 8-10):
For the Graham Cracker Crust:
- 1 1/2 cups graham cracker crumbs
- 6 tablespoons unsalted butter, melted
- 2 tablespoons sugar
- 1/2 cup shredded sweetened coconut, finely chopped
For the Coconut Filling:
- 2 cans (14 oz each) full-fat coconut milk, refrigerated overnight
- 8 oz cream cheese, completely softened
- 1/2 cup powdered sugar
- 2 teaspoons vanilla extract
- 1 teaspoon coconut extract
- 1 cup sweetened shredded coconut, toasted
For Topping:
- 1 cup heavy whipping cream
- 2 tablespoons powdered sugar
- 1 teaspoon vanilla extract
- 1/2 cup toasted coconut flakes
How to Make It:
Refrigerate the coconut milk cans overnight this separates the thick cream from the water, giving you solid coconut cream to work with.
Make the crust by combining graham cracker crumbs, melted butter, sugar, and finely chopped coconut. Press firmly into a 9-inch pie dish. Freeze for 20 minutes.
Open the chilled coconut milk cans carefully and scoop out just the thick coconut cream that has solidified at the top discard or save the coconut water for smoothies. Beat the cream cheese until smooth. Add the coconut cream, powdered sugar, vanilla, and coconut extract. Beat until completely smooth and silky. Fold in the toasted shredded coconut.
Pour the filling into the frozen crust and smooth the top. Refrigerate for at least 6 hours.
Whip the heavy cream with powdered sugar and vanilla to stiff peaks. Spread or pipe over the set filling. Scatter toasted coconut flakes over everything.
Slice and serve cold.
13. Peaches and Cream Parfaits
Summer peaches at peak ripeness need very little help to become extraordinary. This parfait combines them with vanilla mascarpone cream, crunchy honey-roasted almonds, and a drizzle of honey in a layered glass that looks gorgeous and tastes even better. It’s elegant, seasonal, and takes about ten minutes to assemble.
What You’ll Need (serves 4):
- 4 ripe peaches, sliced (or 2 cups frozen peach slices, thawed)
- 2 tablespoons honey, plus more for drizzling
- 1 tablespoon lemon juice
- 1/2 teaspoon vanilla extract
- Pinch of cinnamon
For the Mascarpone Cream:
- 8 oz mascarpone cheese
- 1/2 cup heavy whipping cream
- 3 tablespoons powdered sugar
- 1 teaspoon vanilla extract
- Zest of 1 lemon
For the Crunch:
- 1/2 cup sliced almonds, toasted
- 2 tablespoons honey
- Pinch of sea salt
For Garnish:
- Fresh mint
- Extra peach slices
- A drizzle of honey
How to Make It:
Toss the sliced peaches with honey, lemon juice, vanilla, and cinnamon. Let them macerate for 15 minutes the peaches will release their juices and become saucy and fragrant.
Make the honey almonds by tossing the toasted almonds with honey and sea salt. Spread on a piece of parchment and let cool until they crisp up.
Make the mascarpone cream by beating the mascarpone until smooth. Add the heavy cream, powdered sugar, vanilla, and lemon zest. Beat on medium-high until the mixture is light, creamy, and holds soft peaks.
To assemble: spoon a layer of mascarpone cream into the bottom of each glass. Add a layer of macerated peaches with their juices. Sprinkle honey almonds. Repeat the layers. Top with a final spoonful of cream, a few peach slices, extra honey almonds, a drizzle of honey, and a fresh mint sprig.
Serve immediately or refrigerate for up to 2 hours.
14. Chocolate Mousse
Classic French chocolate mousse airy, intensely chocolatey, and impossibly light despite the richness of the ingredients. This no-bake dessert requires no cooking beyond melting chocolate and can be made the day before, making it the perfect elegant dinner party dessert that requires zero day-of effort.
What You’ll Need (serves 6):
- 8 oz good quality dark chocolate (70% cocoa or higher), finely chopped
- 4 large eggs, separated (room temperature)
- 3 tablespoons sugar, divided
- 1 cup heavy whipping cream, cold
- 1 teaspoon vanilla extract
- Pinch of salt
- Pinch of cream of tartar
For Serving:
- Extra whipped cream
- Chocolate shavings
- Fresh raspberries
- Flaky sea salt
How to Make It:
Melt the chocolate in a heatproof bowl set over a pot of barely simmering water, stirring until completely smooth. Remove from heat and let cool slightly it should be warm but not hot.
Beat the egg yolks with 2 tablespoons of sugar until pale and thick about 3 minutes. Stir the yolk mixture into the warm chocolate until combined.
In a clean bowl, beat the egg whites with the cream of tartar and a pinch of salt until foamy. Gradually add the remaining tablespoon of sugar and continue beating until stiff, glossy peaks form. They should hold their shape and look smooth, not dry.
In a separate bowl, whip the heavy cream with vanilla to soft peaks not stiff, just barely holding shape. Soft whipped cream folds in more easily and gives a lighter mousse.
First, fold one third of the egg whites into the chocolate mixture this lightens it and makes folding in the rest easier. Then add the remaining egg whites in two additions, folding gently with a large rubber spatula using a J-shaped motion from the bottom of the bowl upward. Finally, fold in the whipped cream in two additions.
Divide the mousse among serving glasses or ramekins. Cover and refrigerate for at least 4 hours.
Serve with extra whipped cream, chocolate shavings, and fresh raspberries. A tiny pinch of flaky sea salt on top is the finishing touch that makes the chocolate flavor sing.
15. Fresh Berry Trifle
The trifle that glorious British layered dessert is perfectly designed for summer. No baking required (use store-bought pound cake or ladyfingers), and it showcases the season’s best berries in the most dramatic possible way. It’s built for crowds, impossible to mess up, and looks like a million dollars in a glass trifle bowl.
What You’ll Need (serves 12-14):
- 1 store-bought pound cake or angel food cake, cut into 1-inch cubes
- 4 cups mixed fresh berries strawberries, blueberries, raspberries, blackberries
- 3 tablespoons sugar
- 2 tablespoons orange juice or berry liqueur
For the Cream Layers:
- 16 oz mascarpone or cream cheese, softened
- 1/2 cup powdered sugar
- 2 teaspoons vanilla extract
- 2 cups heavy whipping cream, whipped to stiff peaks
- Zest of 1 lemon
For the Berry Sauce:
- 2 cups mixed berries
- 3 tablespoons sugar
- 2 tablespoons lemon juice
How to Make It:
Make the berry sauce by combining the berries, sugar, and lemon juice in a small saucepan over medium heat. Cook for 8-10 minutes until the berries break down into a thick, glossy sauce. Let cool completely.
Toss the fresh berries with sugar and orange juice. Let them macerate for 15 minutes.
Beat the mascarpone with powdered sugar, vanilla, and lemon zest until smooth. Fold in the whipped cream until fully combined and light.
In a large trifle bowl, create the layers. Start with half the cake cubes pressed into the bottom. Drizzle the berry sauce generously over the cake it should soak in slightly. Spread half the cream mixture over the cake. Top with half the macerated berries. Repeat: remaining cake, more berry sauce, remaining cream, remaining berries.
The top layer should be the berries arrange them beautifully for visual impact. Refrigerate for at least 4 hours.
Serve by scooping deeply to get all the layers in each serving.
16. Frozen Yogurt Bark with Summer Fruits
We close with the most joyful, most Instagram-worthy, most effortless dessert on this entire list. Frozen yogurt bark is exactly what it sounds like Greek yogurt spread on a sheet pan, decorated with summer fruits and toppings, frozen solid, and broken into dramatic shards. It’s healthy enough to eat for breakfast, delicious enough to serve as dessert, and beautiful enough to look completely intentional even though it required approximately eight minutes of effort.
What You’ll Need (serves 6-8):
The Base:
- 3 cups full-fat Greek yogurt (vanilla or plain if using plain, add 3 tablespoons honey and 1 teaspoon vanilla)
- 2 tablespoons honey
- 1 teaspoon vanilla extract
The Toppings go wild and make it beautiful:
- Fresh sliced strawberries
- Fresh blueberries
- Fresh raspberries
- Sliced peaches or nectarines
- Sliced kiwi
- Pomegranate seeds
- Toasted coconut flakes
- Crushed pistachios or almonds
- Mini chocolate chips
- Granola clusters
- Drizzle of honey
- Drizzle of melted dark chocolate
- Edible flowers (for a truly spectacular presentation)
- Lemon zest
- Fresh mint leaves
How to Make It:
Line a large rimmed sheet pan with parchment paper. Mix the yogurt with honey and vanilla until smooth.
Pour the yogurt onto the center of the prepared pan. Use a spatula to spread it into an even layer about 1/3 to 1/2 inch thick. Try to keep it relatively uniform so it freezes evenly.
Now the creative part arrange your toppings across the yogurt. You can go organized and geometric, placing fruits in rows or patterns. Or you can go wild and beautiful, scattering everything in abundance. Either way, press the toppings gently into the yogurt so they adhere. Drizzle with honey and melted chocolate if using.
Slide the pan into the freezer and freeze for at least 4 hours until completely solid.
When ready to serve, pull the parchment off the pan and break the bark into irregular pieces the imperfect, jagged shapes are part of the charm. Serve immediately, arranged on a platter.
Store any leftover pieces in a zip-lock bag in the freezer. They keep for up to 2 weeks though they rarely last that long.