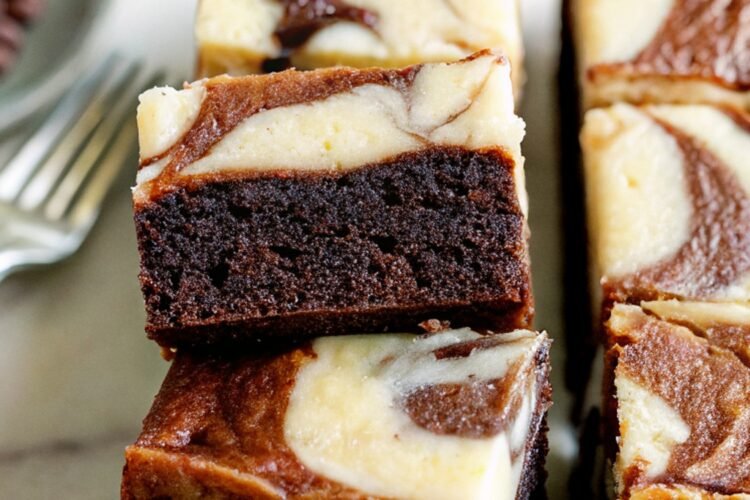
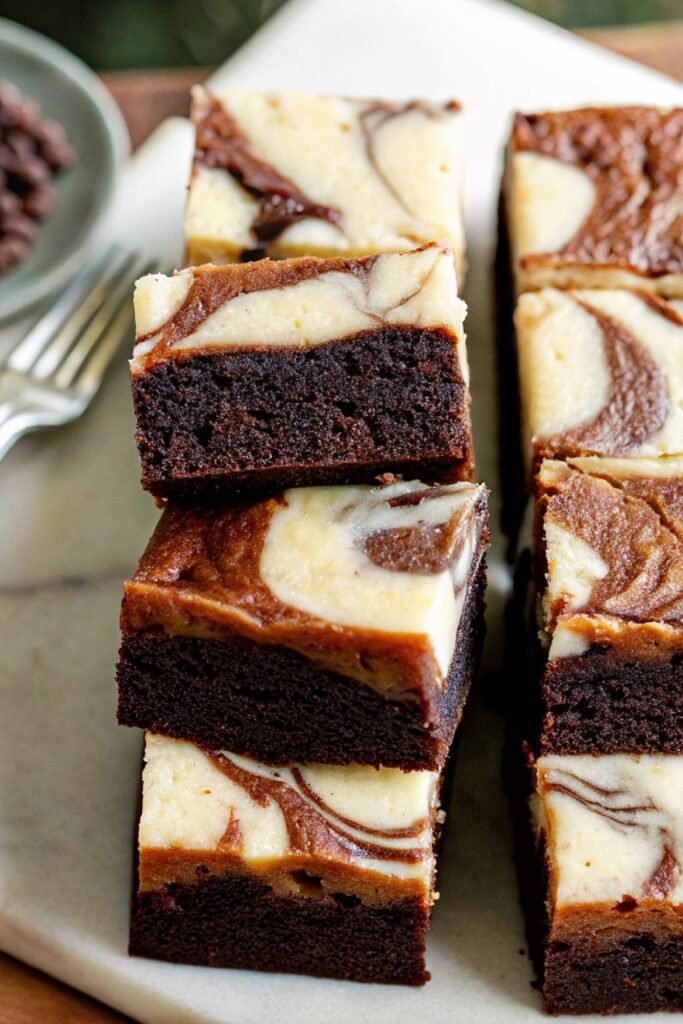
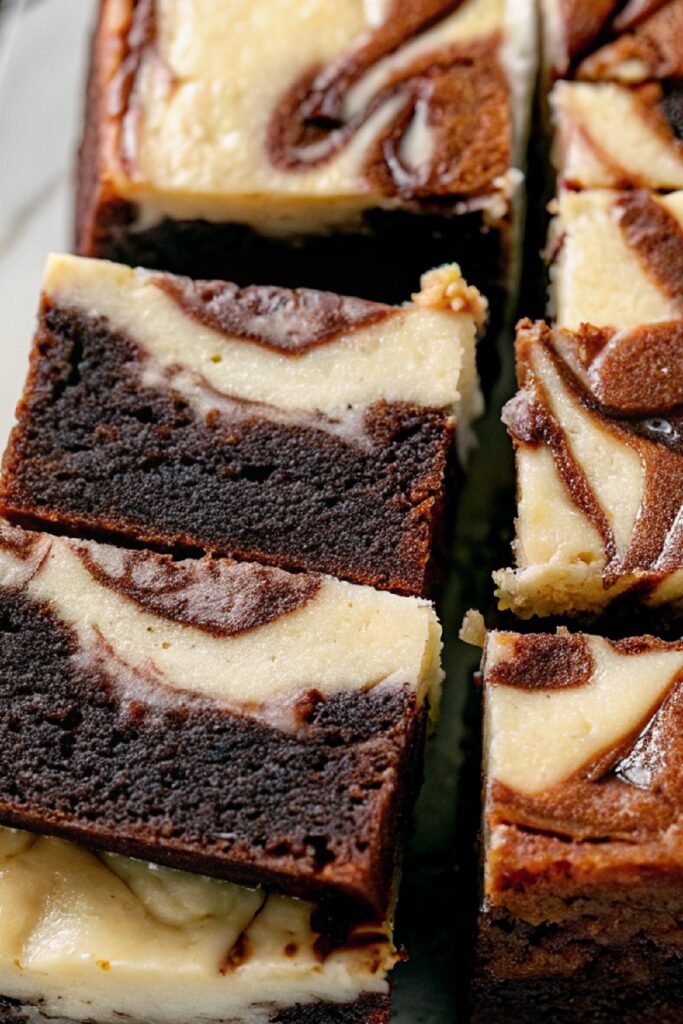
A classic chocolate brownie cheesecake bar filled with a dense fudgy brownie base and a smooth creamy cheesecake layer. It’s super easy to make, very customizable, keeps really well, and is the perfect dessert to any potluck, BBQ or casual gathering!
I’ve been making a variation of these brownie cheesecake bars for several years now. They always get such rave reviews, so I figured it was time to share it with you!
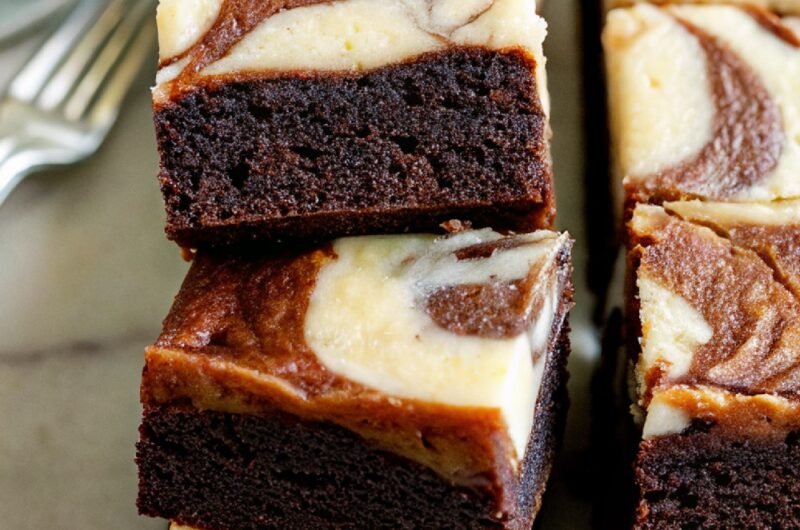
Brownie cheesecake bars are completely customizable, and you can add whatever you like! My perfect combination is a rich fudgy brownie base with a tangy creamy cheesecake layer, topped with a sprinkle of sea salt or a drizzle of melted chocolate. It’s delicious and full of deep chocolate flavor and smooth, creamy texture.
Ingredients in Chocolate Brownie Cheesecake Bars
This ingredient setup keeps things simple while building clear layers of flavor.
How to make Chocolate Brownie Cheesecake Bars
This recipe moves in layers, and each step builds toward a clean final texture.
1. Prepare the brownie batter
Start by melting butter and chocolate together until smooth. Stir in sugar while the mixture stays warm so it dissolves properly. Add eggs one at a time and mix until glossy. Fold in flour and a pinch of salt until just combined. The batter should look thick and smooth without overmixing.
2. Spread the brownie base
Line a baking pan and pour most of the brownie batter into it, saving a small portion for later. Spread it evenly so the base cooks at the same rate. A flat surface helps the cheesecake layer sit properly on top.
3. Make the cheesecake layer
In another bowl, mix cream cheese, sugar, egg, and vanilla extract until smooth and creamy. Keep mixing until no lumps remain. This step matters since a smooth batter gives a clean, soft top layer after baking.
4. Add the cheesecake layer
Pour the cheesecake mixture over the brownie base and spread gently. Try not to press too hard so the layers stay separate. Even spreading keeps the bars neat when sliced.
5. Create a swirl effect
Drop small spoonfuls of the reserved brownie batter over the cheesecake layer. Use a knife to swirl lightly through the top. This creates a marbled look without mixing the layers completely.
6. Bake until set
Place the pan in a preheated oven and bake until the edges look firm and the center stays slightly soft. Avoid overbaking so the brownie layer stays fudgy and the cheesecake layer remains creamy.
7. Cool completely
Let the bars cool in the pan first, then transfer to the fridge. Chilling helps the layers firm up and makes slicing much easier.
8. Slice into bars
Use a sharp knife to cut into squares once fully chilled. Clean the blade between cuts for neat edges.
How to serve Chocolate Brownie Cheesecake Bars
These bars taste best when slightly chilled since the cheesecake layer stays firm and smooth. The brownie base softens just enough to give a fudgy bite without falling apart.
For a simple dessert plate, serve them as they are or with a light dusting of cocoa powder. That small touch brings out the chocolate flavor even more without adding extra sweetness.
They also work well for gatherings since you can cut them into smaller squares and serve as bite sized treats. Keeping them chilled until serving helps maintain their clean shape and layered look.
Recipe Tips
- Use room temperature cream cheese so the cheesecake layer mixes smoothly without lumps.
- Do not overmix the brownie batter once flour goes in to keep the texture soft.
- Reserve a small portion of brownie batter for the swirl to create a better visual finish.
- Bake just until the center looks slightly set to avoid drying out the brownie layer.
- Chill fully before slicing to keep layers neat and firm.
- Use a lined pan for easy removal and cleaner edges.
- Wipe the knife after each cut to keep slices sharp and defined.
Chocolate Brownie Cheesecake Bars
Course: DessertCuisine: AmericanDifficulty: Easy12
servings20
35
minutes120
Ingredients
1 cup butter
1 cup chocolate or ¾ cup cocoa powder
1 ½ cups sugar
3 eggs
1 cup flour
Pinch of salt
1 teaspoon vanilla extract
Cheesecake Layer
8 oz cream cheese
½ cup sugar
1 egg
½ teaspoon vanilla extract
Directions
- Prepare the brownie batter:
Start by melting butter and chocolate together until smooth. Stir in sugar while the mixture stays warm so it dissolves properly. Add eggs one at a time and mix until glossy. Fold in flour and a pinch of salt until just combined. The batter should look thick and smooth without overmixing. - Spread the brownie base:
Line a baking pan and pour most of the brownie batter into it, saving a small portion for later. Spread it evenly so the base cooks at the same rate. A flat surface helps the cheesecake layer sit properly on top. - Make the cheesecake layer:
In another bowl, mix cream cheese, sugar, egg, and vanilla extract until smooth and creamy. Keep mixing until no lumps remain. This step matters since a smooth batter gives a clean, soft top layer after baking. - Add the cheesecake layer:
Pour the cheesecake mixture over the brownie base and spread gently. Try not to press too hard so the layers stay separate. Even spreading keeps the bars neat when sliced. - Create a swirl effect:
Drop small spoonfuls of the reserved brownie batter over the cheesecake layer. Use a knife to swirl lightly through the top. This creates a marbled look without mixing the layers completely. - Bake until set:
Place the pan in a preheated oven and bake until the edges look firm and the center stays slightly soft. Avoid overbaking so the brownie layer stays fudgy and the cheesecake layer remains creamy. - Cool completely:
Let the bars cool in the pan first, then transfer to the fridge. Chilling helps the layers firm up and makes slicing much easier. - Slice into bars:
Use a sharp knife to cut into squares once fully chilled. Clean the blade between cuts for neat edges.